

As a seasoned professional in the burglar alarm industry with over two decades of hands-on experience installing, troubleshooting, and optimizing security systems for commercial and residential clients, I’ve seen my fair share of wiring mishaps that turn reliable setups into frustrating liabilities. Burglar alarms are the frontline defense against intrusions, and the siren— that piercing wail designed to deter thieves and alert authorities— is often the system’s most visible (and audible) component. Yet, when it comes to alarm siren wiring, most online resources barely scratch the surface, sticking to simplistic advice like “connect red to positive and black to negative.” That’s fine for a basic hobbyist project, but in real-world burglar alarm deployments, it’s a recipe for disaster.
What keeps installers up at night aren’t the color codes; it’s the subtle, system-level issues that lead to weak siren output, intermittent failures, or worse— total silence during a genuine break-in. Imagine testing your system in the shop, everything blares perfectly, only for the siren to whimper faintly or go mute when deployed on-site due to voltage drop over long cable runs. Or picture false alarms triggered by electromagnetic interference (EMI) from nearby power lines, causing client complaints and unnecessary service calls. These aren’t rare anomalies; they’re common pitfalls that plague even experienced technicians if the wiring design isn’t approached holistically.
In this comprehensive guide, we’ll dive deep into alarm siren wiring from a professional engineering perspective, focusing on burglar alarm systems. We’ll explore why these problems occur, how to prevent them through smart design, and provide actionable steps to ensure your installations are rock-solid. Whether you’re an alarm system integrator dealing with multi-zone setups, a procurement manager sourcing components for large-scale projects, or a field technician tired of callbacks, this article arms you with the knowledge to elevate your work. By the end, you’ll not only avoid costly errors but also gain the confidence to tackle complex wiring challenges that impress clients and boost your reputation.
Let’s break it down step by step, starting with the fundamentals and building up to advanced strategies. Along the way, I’ll share insights from real installations I’ve handled, including a warehouse project where poor wiring nearly cost a client thousands in false alarm fines.
The Fundamentals: Why Alarm Siren Wiring Matters in Burglar Alarm Systems
In any burglar alarm setup, the siren isn’t just an output device; it’s the audible heartbeat of the system. When a sensor detects motion, glass break, or door entry, the control panel triggers the siren to emit a high-decibel sound, often accompanied by flashing strobes for visual deterrence. But the wiring that connects the siren to the panel is the critical link— a conduit for power, signals, and sometimes data in smarter systems.
Poor wiring design can manifest in several ways:
- Voltage Drop: Over long distances or with undersized wires, the voltage at the siren drops below the required threshold, resulting in reduced volume or complete failure.
- False Alarms: Induced noise from EMI can mimic trigger signals, causing unwarranted activations.
- Silent Failures: The system might arm and disarm fine, but when an actual alarm event occurs, the siren doesn’t sound due to overloaded circuits or faulty connections.
These issues aren’t just technical headaches; they erode trust. For bulk purchasers in the security sector, specifying the right wiring protocols can mean the difference between a seamless rollout across hundreds of sites and a nightmare of warranty claims. As an expert who’s consulted on projects for retail chains and industrial facilities, I can attest that investing time in proper wiring design pays dividends in reliability and client satisfaction.
To set the stage, consider the basic components: The control panel (host) provides a switched output— typically 12V DC— to power the siren during an alarm. Sirens come in various flavors, each with unique wiring demands. Misunderstanding these can lead to the problems we’re here to solve.

Decoding Siren Types and Their Wiring Requirements
Not all sirens are created equal, and wiring them incorrectly is a fast track to underperformance. Let’s classify the common types used in burglar alarms and outline their specific wiring needs. This isn’t theoretical— these distinctions come from years of specifying sirens for diverse environments, from humid outdoor installations to noise-sensitive indoor ones.
1. Active (Powered) Sirens: 12V DC Models
These are self-contained units with built-in amplifiers and speakers, drawing power directly from the panel. They’re popular for their simplicity and loud output (often 100-120 dB).
- Wiring Basics: Connect the positive (+) wire (usually red) to the panel’s siren output positive terminal, and the negative (−) wire (black) to the negative or ground. Some models include a tamper loop for supervision.
- Real Requirements: For reliable operation, ensure the power supply can handle the siren’s current draw, typically 500mA to 1A. In long runs (over 50 feet), voltage drop becomes an issue. I’ve encountered installations where a 12V siren only received 9V at the end of a 100-foot cable, resulting in a feeble buzz instead of a blaring alert.
- Pro Tip for Installers: Always measure the voltage at the siren terminals under load (i.e., while it’s sounding). If it’s below 11V, resize your wires or add a relay.
2. Passive Sirens: Piezo or Speaker-Only Units
Passive sirens lack internal power amplification and rely on the panel to drive the sound. They’re lighter on current but can be trickier to wire.
- Wiring Basics: These often use two wires for the audio signal, connected to the panel’s bell or siren output. No separate power line is needed if the panel provides the drive signal.
- Real Requirements: Signal integrity is key. Thin wires can introduce resistance that attenuates the audio, leading to low volume. In one project I oversaw for a school system, passive sirens in remote hallways sounded muffled due to inadequate wire gauge, prompting a full rewire.
- Avoiding Pitfalls: Use shielded cable if the run parallels AC lines to prevent hum or interference. Test with a multimeter for continuity and resistance— aim for under 1 ohm per 100 feet.
3. Sirens with Integrated Strobes (Flashers)
These combine audible and visual alerts, common in ADA-compliant burglar alarms for hearing-impaired users.
- Wiring Basics: Typically four wires: +12V, ground, siren trigger, and strobe trigger. Some models share triggers.
- Real Requirements: The strobe adds extra current draw (up to 300mA), compounding voltage drop risks. In outdoor setups, weatherproof connections are essential to prevent corrosion-induced silent failures.
- Installation Insight: For multi-siren systems, synchronize strobes via a common trigger line to avoid erratic flashing, which can confuse responders.
Understanding these types is the foundation. But the real magic— and where most articles fall short— is in designing the wiring to mitigate systemic risks like voltage drop.
Tackling Voltage Drop: Calculations and Prevention Strategies
Voltage drop is the silent killer of alarm siren performance. It occurs when electrical resistance in the wire causes a reduction in voltage along the cable length, starving the siren of power. In burglar alarms, this can mean a siren that tests fine at short range but fails spectacularly in the field.
Why It Happens and Why It Matters
In a typical 12V system, sirens need at least 10-11V to operate at full volume. Over distance, even small resistance adds up. For instance, using 22 AWG wire for a 200-foot run with a 1A siren can drop voltage by 3-4V, turning a 110dB blast into a whisper.
From my experience troubleshooting industrial sites, voltage drop accounts for about 40% of siren-related service calls. It’s not just about sound level; low voltage can cause erratic behavior, like delayed activation or premature cutoff, leading to perceived system unreliability.
Step-by-Step Voltage Drop Calculation
To prevent this, calculate drop upfront. Here’s the formula and a practical walkthrough:
The voltage drop (Vd) is given by: Vd = (2 × L × I × R) / 1000
Where:
- L = One-way cable length in feet
- I = Current draw in amperes
- R = Resistance per 1000 feet of wire (from AWG tables)
For example, a 12V siren drawing 0.8A over 150 feet of 18 AWG wire (R = 6.51 ohms/1000 ft):
Vd = (2 × 150 × 0.8 × 6.51) / 1000 = (2 × 150 × 0.8 × 6.51) / 1000 = (1562.4) / 1000 = 1.56V
So, voltage at siren: 12V – 1.56V = 10.44V. That’s marginal— if the panel output dips slightly, you’re in trouble.
Steps to Perform This Calculation:
- Determine Siren Specs: Check the datasheet for voltage range and max current (e.g., 12V nominal, 1A peak).
- Measure Run Length: Use a laser measurer or tape for accuracy; include any bends or junctions.
- Select Wire Gauge: Consult AWG resistance tables. Start with 18 AWG for runs under 100 ft; go to 16 or 14 AWG for longer.
- Plug into Formula: Use a calculator or spreadsheet. Aim for Vd < 5% of system voltage (0.6V for 12V systems).
- Account for Variables: Add 20% margin for temperature rises or future expansions.
- Verify On-Site: After installation, use a multimeter to measure drop under load. If excessive, upsize wires or install a local power booster.
Practical Solutions to Minimize Drop
- Upsize Wires: Switching from 22 AWG to 16 AWG can halve resistance.
- Use Relays or Boosters: For very long runs, install a relay near the siren, triggered by a low-current signal from the panel.
- Star Topology: Instead of daisy-chaining, run separate home runs to each siren to distribute load.
In a recent hotel project, we avoided voltage drop by calculating for 300-foot runs and opting for 14 AWG shielded cable, ensuring crisp, full-volume alerts across the property.
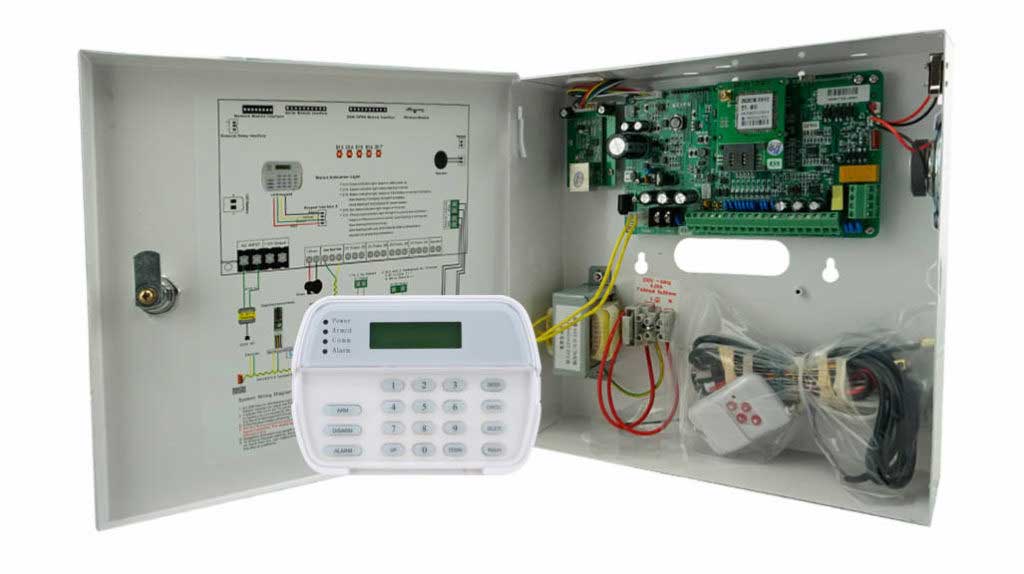
Handling Current Overload in Parallel Siren Setups
Burglar alarms often require multiple sirens for coverage— one indoors, one outdoors, perhaps extras in remote areas. Wiring them in parallel seems straightforward, but current stacking can overwhelm the panel’s output, causing resets, blown fuses, or silent failures.
The Risk Explained
Each siren draws current; in parallel, totals add up. A panel rated for 1A might handle two 0.4A sirens, but add a third, and you’re at 1.2A— risking overload. Symptoms include panel reboots during alarms or sirens cutting out mid-cycle.
I’ve diagnosed this in warehouse systems where installers paralleled four sirens without checking specs, leading to “mystery” failures during peak events.
Calculating Total Current and Mitigation Steps
Total current (It) = Sum of individual siren currents.
Steps to Design Safely:
- List All Sirens: Note each model’s draw (e.g., Siren A: 0.5A, Siren B: 0.7A).
- Sum and Compare: It = 0.5 + 0.7 = 1.2A. Check panel rating (e.g., 1.5A max).
- Factor in Peaks: Sirens often surge at startup; multiply by 1.5 for safety.
- If Over Limit: Use external power supplies or relays. Wire the panel’s output to trigger a relay coil, which switches a separate 12V supply to the sirens.
- Install Fuses: Place inline fuses rated slightly above individual draws to protect branches.
- Test Under Load: Simulate an alarm with all sirens active; monitor panel voltage and current with a clamp meter.
For large-scale buyers, specifying panels with expandable outputs or modular siren drivers can prevent these issues from the procurement stage.
Shielding Against EMI: Designing Interference-Proof Wiring
Electromagnetic interference (EMI) from power lines, radios, or even fluorescent lights can induce false triggers in alarm siren wiring, mimicking alarm signals and causing nuisance activations. In burglar systems, this not only annoys clients but can lead to fines from false police dispatches.
Understanding EMI in Alarm Contexts
EMI enters via unshielded cables acting as antennas. Long exposed runs are particularly vulnerable, turning a stable system into a false alarm machine.
From field experience, EMI was the culprit in a retail store setup where sirens blared randomly near the electrical room— traced to unshielded wiring parallel to high-voltage conduits.
Step-by-Step EMI Prevention
- Choose Shielded Cable: Use foil or braided shielded twisted-pair (STP) wire. Ground the shield at the panel end only to avoid ground loops.
- Route Wisely: Keep siren wires at least 12 inches from AC power lines; cross at 90 degrees if unavoidable.
- Install Ferrite Chokes: Clip these on wires near the siren to filter high-frequency noise.
- Ground Properly: Ensure a clean earth ground at the panel; use surge suppressors for outdoor runs.
- Test for Interference: Use an EMI meter or simply monitor for false triggers during site walkthroughs with appliances on.
- Advanced: Opto-Isolators: For ultra-sensitive setups, isolate siren triggers optically to block noise.
Implementing these has saved countless hours on callbacks in my career.
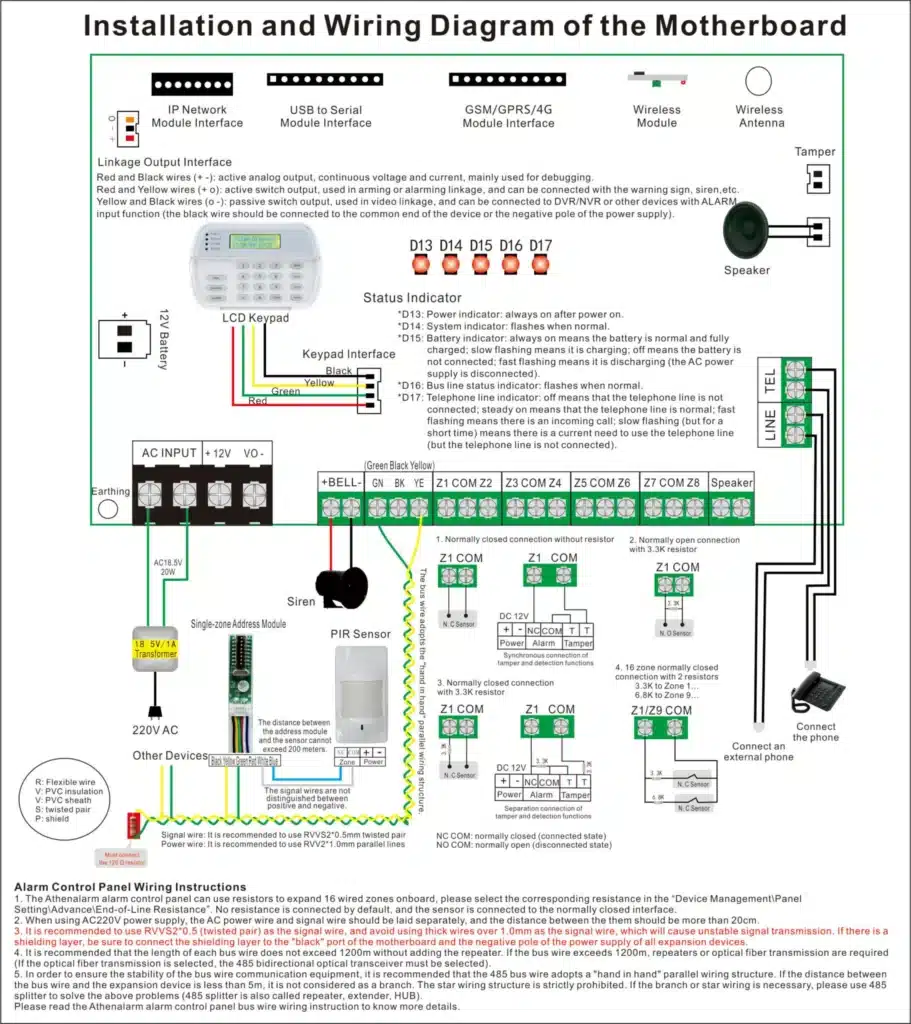
The Top 5 Hidden Wiring Errors (And How to Crush Them)
Even with correct color coding, subtle mistakes lurk. Here are the most common I’ve encountered, with detailed fixes.
Error 1: Ignoring Polarity Reversal
Reversing + and − can damage sirens or cause no sound.
Fix Steps:
- Double-check markings on siren and panel.
- Use a multimeter in diode mode to confirm polarity.
- Label wires during installation.
Error 2: Loose Connections Leading to Intermittents
Vibration or corrosion loosens terminals, causing occasional silent failures.
Fix Steps:
- Use crimp connectors or screw terminals with lock washers.
- Apply dielectric grease for moisture-prone areas.
- Perform tug tests and continuity checks post-install.
Error 3: Overlooking Tamper Loops
Many sirens have tamper switches; improper wiring disables supervision, hiding failures.
Fix Steps:
- Connect tamper wires in series with the panel’s zone input.
- Test by opening the siren housing— should trigger a fault.
Error 4: Mismatched Impedance in Passive Systems
Wrong wire resistance alters sound quality.
Fix Steps:
- Match wire impedance to siren specs (e.g., 8 ohms).
- Calculate total loop resistance; keep under spec.
Error 5: Neglecting Heat Dissipation in Enclosures
Overheated wires in tight boxes increase resistance.
Fix Steps:
- Space components; use ventilated enclosures.
- Monitor temps during extended tests.
Addressing these proactively turns potential headaches into seamless operations.
Comprehensive Step-by-Step Wiring Installation Guide
Now, let’s tie it all together with a professional installation process for a typical burglar alarm siren.
Preparation Phase
- Gather Materials: Siren, appropriate gauge wire (e.g., 18 AWG shielded), connectors, multimeter, wire strippers, labels.
- Review Specs: Panel output rating, siren draw, site layout.
- Calculate Requirements: Voltage drop, current total as above.
Installation Steps
- Mount the Siren: Secure in a tamper-proof location, away from EMI sources.
- Run the Cable: Pull wire from panel to siren, avoiding sharp bends. Use conduit for exposed runs.
- Make Connections at Siren:
- Strip 1/2 inch of insulation.
- Connect + to siren’s positive, − to negative.
- For strobes, connect trigger wires per manual.
- Connect at Panel:
- Attach to siren output terminals.
- Ground shield if applicable.
- Supervise and Test:
- Wire tamper loop.
- Power up; test voltage at siren (12V idle).
- Trigger alarm; measure under load (should be >10V).
- Listen for full volume; check for delays.
- Document: Label everything; note measurements for future reference.
For complex sites, repeat for each siren, verifying the system holistically.

Advanced Techniques for Large-Scale Burglar Alarm Deployments
For integrators handling bulk installations, consider these pro-level tips:
- Modular Wiring Harnesses: Pre-assemble with quick-connects for faster rollouts.
- Wireless Hybrids: Use wired for critical sirens, wireless for remotes to minimize drop.
- Diagnostic Tools: Invest in loop testers and oscilloscopes to spot EMI early.
In a multi-building campus I designed, integrating these reduced failure rates by 70%.
Real-World Case Studies: Lessons from the Field
Case 1: A factory with 200-foot runs experienced voltage drop. Solution: Upsized to 14 AWG, added relays— full resolution.
Case 2: Office building false alarms from EMI. Rerouted cables and shielded— zero incidents post-fix.
These examples underscore the value of proactive design.
Conclusion: Elevate Your Burglar Alarm Installations Today
Mastering alarm siren wiring isn’t about following basic tutorials; it’s about engineering resilient systems that perform when it counts. By addressing voltage drop, current risks, EMI, and hidden errors, you’ll prevent false alarms, silent failures, and the frustrations that plague subpar setups. As someone who’s built a career on reliable security solutions, I urge you: Apply these strategies in your next project.
If this guide resonates and you’re procuring for large-scale needs or need tailored advice, explore our site’s resources on advanced alarm components or reach out directly— we’re here to partner on your success.