

Introduction
In modern security deployments, seamless integration between wireless detectors and the burglar alarm control panel is essential for achieving reliable intrusion detection. Whether securing high-value commercial facilities or upgrading enterprise-level alarm architectures, the ability to correctly pair a wireless PIR motion detector with a professional-grade alarm system directly impacts system stability, false alarm rates, and long-term maintenance efficiency.
Wireless PIR motion detectors—valued for their simplified installation, flexible placement, and stable passive infrared detection—play a critical role in advanced wireless intrusion alarm setups. However, pairing them correctly requires understanding of communication protocols, RF environments, enrollment procedures, and system compatibility.
This technical guide offers step-by-step instructions and professional insights tailored for security technicians, product managers, procurement professionals, and alarm-system decision-makers. It explains essential concepts, pairing procedures, and industry-level best practices for integrating wireless motion sensors into professional burglar alarm control panels.
Understanding the Components
What Is a Wireless PIR Motion Detector?
A wireless PIR (Passive Infrared) motion detector senses changes in infrared energy emitted by moving objects—primarily human intruders. Professional-grade wireless PIRs are engineered to provide stable detection with minimal false alarms.
Key characteristics include:
- PIR technology: Uses dual-element sensors and digital processing to differentiate human motion from environmental noise.
- Wireless protocols: May use Zigbee, Z-Wave, LoRa, 433 MHz proprietary RF, 868 MHz European ISM bands, or manufacturer-specific encrypted protocols.
- Battery performance: Long-life lithium batteries (often 3–5 years) with supervisory signals and low-battery alerts.
- Anti-tamper protection: Front and back tamper detection for compliance with high-security standards.
- False alarm reduction: Features such as pet-immune optics, temperature compensation, or digital signal correlation.
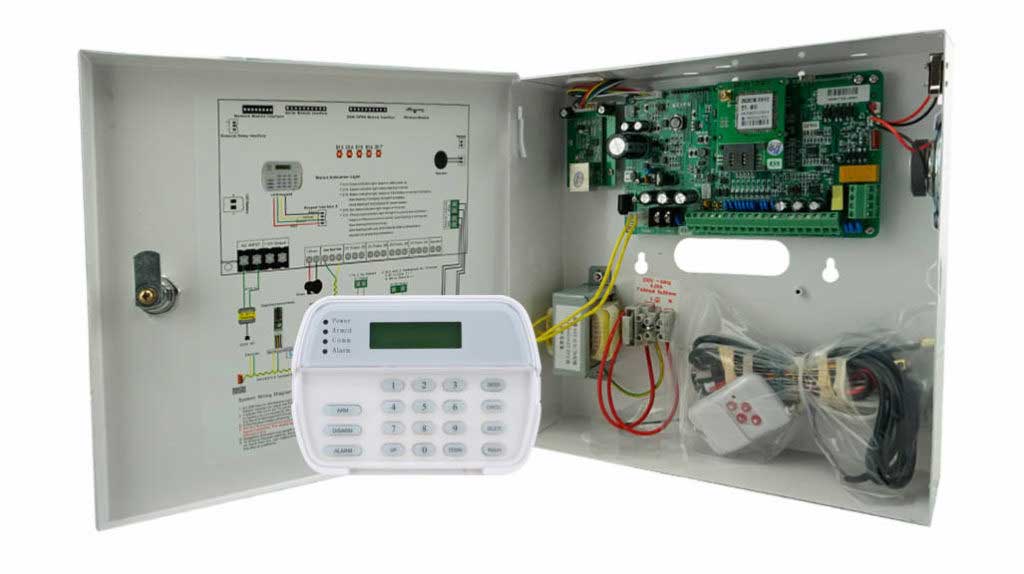
The Role of Professional-Grade Burglar Alarm Control Panels
A burglar alarm control panel serves as the command hub, integrating detectors, managing wireless communication, analyzing alarm events, and reporting to central monitoring stations. For wireless deployments, the panel must support secure RF enrollment, multi-zone configuration, and interference management.
Industry standards reinforce credibility and functional expectations:
- UL 1023 (Household Burglar-Alarm System Units)
- ULC S304 (Canada)
- EN 50131 Grades 1–4, commonly adopted in Europe
- IEC/TR 60839 guidelines for electronic security systems
For procurement teams, verifying control panel compliance with these standards ensures long-term reliability and compatibility across multi-site deployments.
Preparation Before Pairing
1. Compatibility Checks
Before beginning the pairing process, confirm that the wireless PIR motion detector and the burglar alarm control panel share the same:
- Frequency band (433MHz, 868MHz, 915MHz, or 2.4GHz)
- RF protocol type (proprietary encrypted, Zigbee, Z-Wave, etc.)
- Encryption and authentication method
- Firmware version (important for compatibility in large-scale deployments)
Review manufacturer datasheets or integration charts from reputable brands (Honeywell, DSC, Bosch) to avoid pairing failures or unstable communication.
2. Tools and Materials Needed
Prepare the following items:
- Wireless PIR detector and fresh batteries
- Burglar alarm control panel with programming access
- Small screwdrivers
- Manufacturer setup guides
- Optional tools: RF signal meters or diagnostic apps
Safety Tip:
Turn off panel power or switch to installation mode, and comply with local electrical codes and EN/UL installation requirements.
Step-by-Step Pairing Process
Step 1 — Powering Up and Initial Setup
- Open the wireless PIR motion detector housing.
- Insert compatible batteries per manufacturer instructions.
- Verify LED indicators for correct power-up sequence.
- Enter the control panel’s wireless enrollment/programming mode.
- Some systems require navigating to a device-enrollment menu.
- Others support quick-add modes via keypad shortcuts or mobile apps.
Step 2 — Enrolling the Device
Most professional-grade panels support multiple types of enrollment:
A. Auto-Enrollment (Learning Mode)
- Trigger the PIR by waving your hand or activating the tamper switch.
- The detector sends its unique RF ID to the panel.
- Assign the detector to a zone number, zone type (interior, delay, perimeter), and a descriptive label for reporting accuracy.
B. Manual Enrollment
- Enter the detector’s serial number into the panel.
- Complete zone configuration and signal supervision settings.
Troubleshooting Tips:
- If enrollment fails, reposition the detector closer to the panel or wireless expander.
- Check for RF interference from Wi-Fi routers, metal walls, or competing security systems.
- Confirm encryption and protocol compatibility.
Step 3 — Testing and Calibration
After pairing:
- Walk test the area to confirm PIR coverage.
- Check signal strength in the control panel diagnostics menu.
- Adjust mounting angle, sensitivity, or pet-immune settings.
- Verify reporting to monitoring station if applicable.
- For smart-home or IP-based systems, integrate into automation rules (e.g., “motion detected → turn on hallway lights”).
Best Practices for Optimal Performance
Placement and Environmental Considerations
To maintain reliable detection:
- Mount PIR detectors at 2.2–2.4 meters height.
- Avoid pointing at heat sources (HVAC vents, windows with direct sunlight).
- Keep away from moving curtains or reflective surfaces.
- Use pet-immune models for sites with animals.
- Avoid RF-dense areas near Wi-Fi access points or industrial machinery.
Maintenance and Upgrades
- Replace batteries at scheduled intervals (typically every 24–36 months).
- Check tamper protection during routine service visits.
- Update panel firmware, especially for encrypted wireless protocols.
- For procurement managers: choose scalable control panels supporting expansion modules and future wireless standards.
Studies from the Security Industry Association (SIA) emphasize that consistent maintenance significantly reduces false alarms and enhances long-term system stability.
Common Pitfalls and Solutions
| Common Issue | Explanation | Professional Solution |
|---|---|---|
| RF Interference | Caused by Wi-Fi, metal barriers, or competing RF devices | Reposition sensors, use repeaters, apply shielded mounting if needed |
| Encryption Mismatch | Detectors not using panel-approved encryption | Use certified detector models only |
| Weak Signal Strength | Distance or obstacles reduce RF reliability | Reduce distance, improve line of sight, or add wireless expanders |
| Wrong Zone Type Configuration | Motion incorrectly assigned to perimeter/delay zones | Reprogram according to alarm strategy |
| Regional Compliance Issues | Detectors using non-approved RF bands in EU/US | Verify EN 300 220 or FCC Part 15 compliance before procurement |
These fixes help avoid costly installation delays and ensure procurement teams choose compatible and scalable wireless intrusion-detection products.
Conclusion
Correctly pairing a wireless PIR motion detector with a professional-grade burglar alarm control panel is essential for achieving robust intrusion detection, minimizing false alarms, and ensuring long-term system reliability. By following compatibility checks, applying structured enrollment procedures, and adopting industry best practices, technical teams can deploy stable and scalable wireless alarm solutions across commercial and enterprise environments.
For complex deployments or compliance-heavy installations, consult certified security integrators or reference manufacturer guidelines to ensure proper configuration.