
Introduction: Why Rapid Deployment Matters in Modern Intrusion Alarm Systems
Security threats to homes, offices, warehouses, and retail stores continue to evolve. Criminals increasingly exploit locations where traditional wired alarm systems are either absent or too complex to install quickly. In many real-world cases—temporary offices, small businesses, rental properties, retail pop-up stores, construction sites, and remote buildings—security cannot wait for days of installation work.
This is where the WiFi alarm system and GSM WiFi alarm system architecture has transformed the intrusion alarm industry.
Modern wireless alarm platforms combine:
- WiFi connectivity
- RF wireless sensors (commonly 433 MHz)
- Cellular GSM/4G backup communication
- Mobile app remote control
- Plug-and-Play installation
The result is a rapid-deployment intrusion detection network that can be installed, configured, and tested in less than one hour, even by a single technician.
For security integrators, distributors, and professional installers, this type of system creates three major advantages:
- Faster installations
- Lower labor costs
- Scalable protection for small and medium facilities
For end users, the benefits are equally compelling:
- No complicated wiring
- Instant smartphone monitoring
- Flexible sensor placement
- Reliable alarm alerts even when WiFi fails (via GSM)
This comprehensive guide explains exactly how to install a WiFi alarm system quickly and correctly, including:
- Wireless sensor layout planning
- Door/window magnetic contact installation
- PIR motion detector positioning
- Glass break detector placement
- WiFi and GSM network configuration
- Mobile app remote control setup
- Alarm testing and optimization
By the end of this guide, you will understand how to build a complete smart intrusion detection network in under one hour while ensuring professional-grade security performance.
Understanding the Architecture of a GSM WiFi Alarm System
Before installing any intrusion alarm system, it is essential to understand the underlying architecture. A GSM WiFi alarm system typically integrates four key layers:
1. Alarm Control Panel (System Brain)
The control panel acts as the central command center of the entire system.
Typical functions include:
- Receiving wireless sensor signals
- Processing intrusion events
- Activating sirens
- Sending notifications via WiFi or GSM
- Managing system arming and disarming
- Communicating with the mobile application
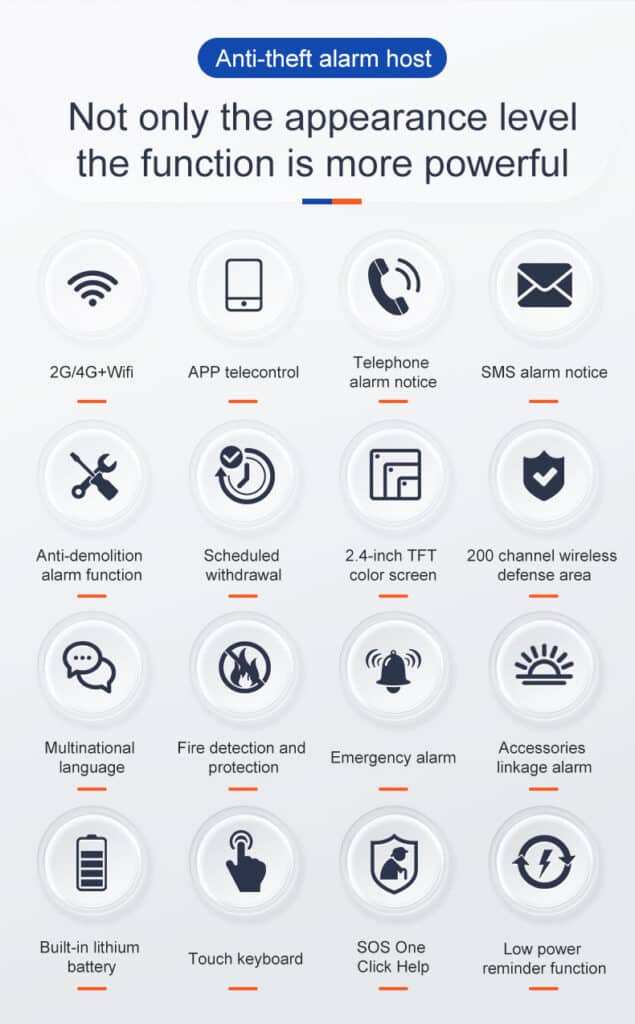
Modern panels usually support:
- 433 MHz RF wireless communication
- WiFi internet connectivity
- GSM/4G cellular backup
- Mobile app integration
The dual communication design ensures that alarm signals are delivered even when internet connectivity is interrupted. Many systems also include a built-in backup battery (typically 3.7V lithium) and tamper protection that triggers an alert if the panel is opened or moved.
2. Wireless RF Sensor Network
The majority of modern wireless alarm sensors communicate with the control panel using low-power RF signals, most commonly 433 MHz.
Typical wireless devices include:
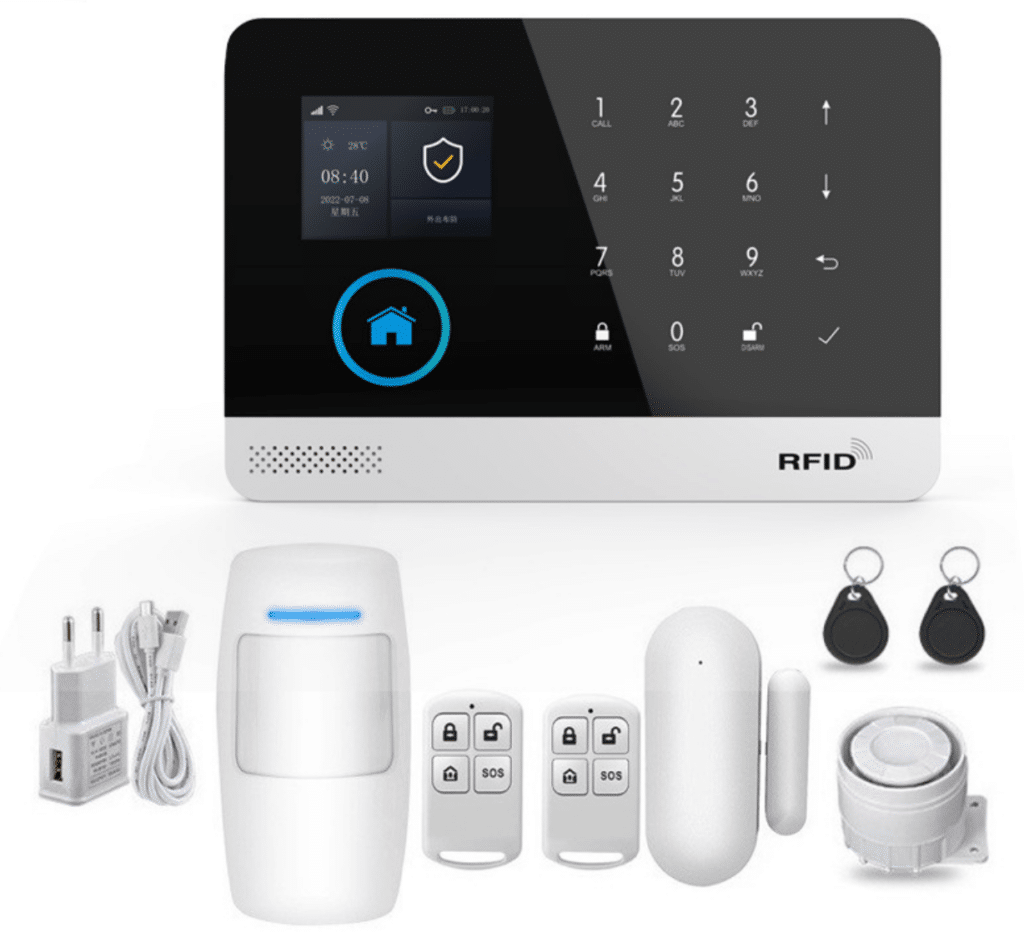
- Door/window magnetic contacts
- PIR motion detectors
- Glass break sensors
- Smoke detectors (optional for comprehensive protection)
- Panic buttons
- Remote controls and RFID cards for quick arm/disarm
Advantages of RF wireless sensors:
- No wiring required
- Long battery life (often 1–2 years)
- Quick installation
- Flexible placement
RF communication range can typically reach:
- 80–150 meters indoors
- 200–300 meters in open areas
Most kits support up to 100 wireless devices, giving you plenty of room to expand later.
3. Communication Layer (WiFi + GSM)
The communication layer ensures alarm signals reach the user.
A WiFi alarm system typically uses:
- Home or office WiFi router
- Cloud server communication
- Smartphone push notifications
A GSM WiFi alarm system adds an additional communication path:
- SMS alarm alerts
- Voice call notifications
- Backup signal transmission
This dual communication architecture dramatically increases system reliability—your alerts still get through during power outages or internet failures.
4. User Interface Layer
Modern alarm systems allow users to interact with the system through:
- Mobile applications
- Remote controls
- Keypads
- SMS commands
The mobile app interface typically allows users to:
- Arm or disarm the system (Away, Stay/Home, or Disarm modes)
- View sensor status and event logs
- Receive alarm notifications
- Control devices remotely
- Monitor system health, including battery levels and tamper status
Why Plug-and-Play WiFi Alarm Systems Are Dominating the Market
Traditional wired alarm systems require:
- Cable routing
- Drilling
- Control panel programming
- Professional installers
Wireless WiFi alarm systems remove most of these barriers.
Major benefits include
- Rapid deployment
Most systems can be installed within 30–60 minutes. - Lower installation cost
No labor-intensive wiring work is required. - Flexible sensor placement
Sensors can be easily repositioned. - Easy system expansion
Additional detectors can be added anytime. - Ideal for temporary or rental environments
Wireless systems are portable and removable without leaving damage.
For security distributors and installers, these features dramatically improve project efficiency and scalability. Voice prompts, on-screen menu hints, and app-based pairing make the entire process truly Plug-and-Play.
Pre-Installation Planning: Designing an Effective Wireless Sensor Layout
Although installation is fast, proper planning remains essential.
A poorly designed sensor layout can create:
- Blind spots
- False alarms
- Weak signal zones
Before installation, perform a simple security risk assessment. Walk through the property with a notepad and mark every potential entry point.
Step 1: Identify Entry Points
Intruders most commonly enter through:
- Front doors
- Back doors
- Ground-floor windows
- Balcony doors
- Garage entrances
Each of these locations should be protected with magnetic door/window sensors.
Step 2: Identify Intrusion Paths
After entering, intruders typically move through:
- Hallways
- Living rooms
- Storage areas
- Offices
- Warehouses
These areas should be protected with PIR motion detectors.
Step 3: Identify High-Value Targets
High-value locations may include:
- Cash registers
- Server rooms
- Equipment storage
- Inventory areas
- Safes
These areas should receive additional motion detection or glass break protection.
Step 4: Plan Control Panel Placement
The alarm panel should be installed:
- Near the center of the building
- Within strong WiFi coverage
- Hidden but accessible
- Near a power outlet
Avoid installing the panel:
- Inside metal cabinets
- Near large electrical equipment
- In basements with poor signal
Pro Tip: Before mounting anything, test RF signal strength by temporarily powering the panel and walking around with a sensor—most apps will show real-time signal quality.
Step-by-Step Installation: Deploying a WiFi Alarm System in Under One Hour
The following procedure outlines a professional installation workflow. Total time: under 60 minutes.
Essential Tools You’ll Need (Minimal)
- Screwdriver or drill (optional)
- Cleaning cloth
- Level (for neat alignment)
- Ladder for high placements
Step 1: Install the Alarm Control Panel
Installation Steps
- Unbox the system and verify all components (host panel, sensors, remotes, RFID cards, siren, power adapter, backup battery).
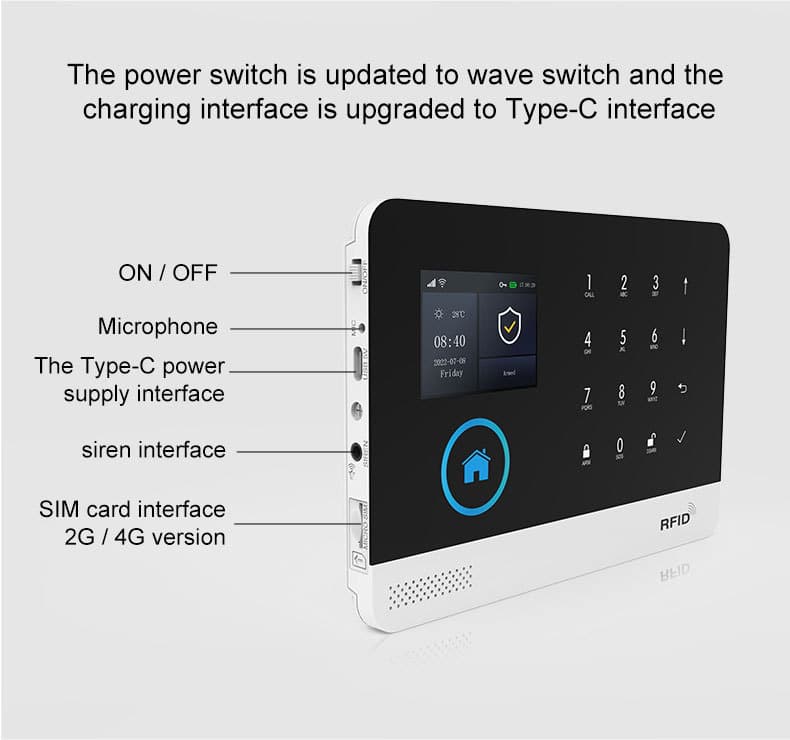
- Insert the backup battery and GSM SIM card (if not pre-installed). Disable the SIM PIN code on your phone first.
- Choose a location near the center of the building.
- Ensure stable WiFi signal strength (use 2.4 GHz only).
- Mount the panel on a wall or place it on a secure surface using the included bracket.
- Connect the power adapter (usually micro USB 5V).
- Turn on the system and follow the voice prompts or TFT display to initialize.
Best Practices
- Avoid placing the panel near large metal surfaces.
- Maintain at least 1 meter distance from routers and electrical devices.
- The built-in tamper switch will now protect the panel itself.
Step 2: Connect the WiFi Network
Once the panel powers on, configure WiFi connectivity.
WiFi Setup Procedure
- Download the system’s dedicated mobile app (most use a Tuya-based platform).
- Create a user account and log in.
- Select “Add Device” and put the alarm panel into WiFi pairing mode (usually by pressing a button or following voice guidance).
- Select the local 2.4 GHz WiFi network.
- Enter the WiFi password.
- Complete device registration—the panel will confirm connection with a beep or voice message.
Connectivity Tips
- Use 2.4 GHz WiFi networks (most alarm systems require this).
- Avoid placing the panel too far from the router.
- Ensure router firewall settings allow outbound communication.
- After connection, check the app for real-time signal strength.
Step 3: Add Wireless Sensors to the System
Wireless sensors must be paired with the control panel.
Typical Pairing Process
- Enter sensor learning mode on the panel (via app or keypad).
- Trigger the sensor once (open the door contact, walk in front of PIR, etc.).
- The panel records the sensor ID and beeps.
- Assign the sensor to a protection zone (Entry/Exit delay, Instant, 24-hour, Perimeter, etc.).
Proper zone configuration ensures correct alarm response—use Entry/Exit zones on main doors so you have time to disarm.
Step 4: Install Door and Window Magnetic Sensors
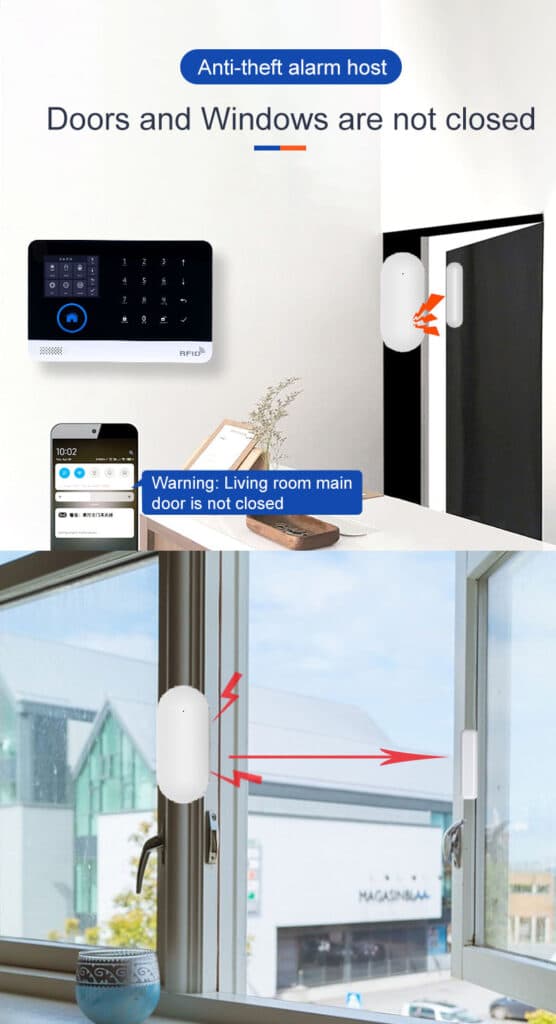
Door sensors are the first line of intrusion detection.
Installation Procedure
- Clean the mounting surface thoroughly.
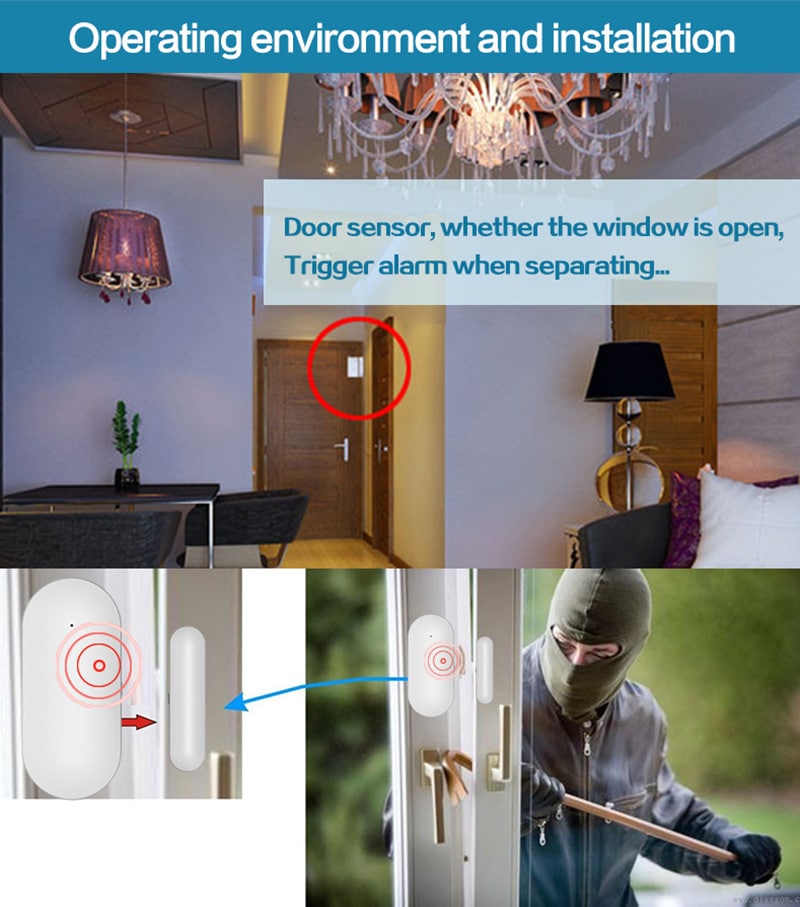
- Attach the sensor body to the fixed door/window frame (top corner recommended).
- Attach the magnet to the moving part of the door itself.
- Align the two components so the gap is less than 10 mm when closed.
Important Installation Rules
- The gap between sensor and magnet should be less than 10 mm.
- Install sensors on the top corner of doors/windows for best concealment.
- Avoid loose mounting surfaces—use the included double-sided tape or screws.
- Immediately test by opening the door; the panel/app should show the zone trigger.
Step 5: Install PIR Motion Detectors
PIR sensors detect human body heat movement.
Optimal Mounting Position
- Height: 2.2–2.4 meters (wall or corner)
- Angle: facing the main intrusion path
- Coverage: large open area
Avoid Installing PIR Sensors
- Facing windows or direct sunlight
- Near air conditioners or heating vents
- In areas with pets (choose pet-immune models if needed)
Extra Step – Walk Test: After mounting, arm the system in test mode, walk across the detection area at normal speed, and confirm the trigger in the app. Adjust angle if needed.
Step 6: Install Glass Break Detectors
Glass break sensors protect large windows or glass doors.
Placement Guidelines
- Within 5–8 meters of the glass surface
- Facing the protected window
- Mounted on wall or ceiling
These sensors detect the acoustic signature of breaking glass. Test by using the manufacturer’s test tool or a controlled clap near the glass (never break actual glass during testing).
Step 7: Install Indoor or Outdoor Sirens
Sirens provide immediate deterrence.
Installation Tips
Indoor sirens:
- Mount near entrance areas
- Avoid hidden locations
Outdoor sirens:
- Install high on exterior walls
- Ensure weather protection
- Pair the wireless siren the same way as other sensors
Loud alarms often cause intruders to abandon the intrusion attempt immediately. Enable tamper protection on the siren for extra security.
Step 8: Configure the Mobile App for Remote Control
Once the system is installed, configure the mobile interface.
Mobile App Functions
Users can:
- Arm the system (Away or Stay mode)
- Disarm the system
- View sensor activity and event history
- Receive instant push notifications
- Manage users and permissions
- Set timing schedules for automatic arm/disarm
Recommended User Permissions
Installers should create an administrator account, add family or staff users, and configure emergency contacts.
Step 9: Configure GSM Backup Alerts
For GSM WiFi alarm systems, configure cellular communication.
Setup Steps
- Insert SIM card (already done in Step 1).
- Disable SIM PIN code.
- In the app or panel menu, add up to 5 preset phone numbers.
- Set SMS alert options and enable voice call alerts if supported.
- Test by sending a manual test SMS from the panel.
This ensures alarms will still be delivered even if WiFi fails.
Step 10: Perform Full Alarm System Testing
Testing ensures the system works correctly.
Testing Checklist
Trigger each sensor individually. Verify:
- Alarm activation
- Siren response
- Mobile push notification
- SMS alerts
- Zone identification in the app
Also test:
- Entry delay (usually 30–45 seconds)
- Exit delay
- Disarm functions
- Tamper alarm (open the panel cover briefly)
- GSM failover (temporarily disconnect WiFi)
Testing should be repeated after final sensor placement adjustments. Walk the entire property to confirm no blind spots.
Optimizing Wireless Sensor Placement
Proper placement improves detection accuracy.
Best Practices
- Protect all entry points first.
- Use motion sensors in main corridors and high-traffic areas.
- Avoid overlapping PIR coverage excessively to prevent false triggers.
- Maintain strong RF signal strength—reposition if the app shows weak bars.
- Replace batteries annually or when the app sends a low-battery warning.
- Clean sensor lenses every 6 months to prevent dust-related false alarms.
Common Installation Mistakes to Avoid
Even experienced installers occasionally make mistakes.
Mistake 1: Weak WiFi or RF signal
Fix: Test signal before final mounting.
Mistake 2: Incorrect PIR positioning
Fix: Never face windows or heat sources.
Mistake 3: Excessive sensor distance
Fix: Always verify range during pairing.
Mistake 4: Poor zone configuration
Fix: Double-check delay zones on entry doors.
Mistake 5: Skipping system testing
Fix: Never hand over without full walk-test.
Mistake 6: Ignoring tamper protection
Fix: Enable and test on every device.
Basic Troubleshooting and Maintenance Tips
- No app notifications? Check WiFi/GSM status in the app and restart the panel.
- False alarms? Adjust PIR sensitivity or reposition away from vents.
- Sensor not responding? Replace battery and re-pair.
- Low battery alerts? Schedule annual replacement—cheap insurance.
Perform a quick monthly test: arm the system and trigger one sensor. Your customers will thank you for the peace of mind.
Deployment Scenarios for WiFi Alarm Systems
These systems are widely used across many environments.
Residential Security
Homes benefit from quick installation, smartphone control, and affordable protection—perfect for renters who can take the system when they move.
Small Business Security
Retail shops, offices, and restaurants require rapid installation, reliable intrusion alerts, and remote monitoring from anywhere.
Warehouses and Storage Facilities
Wireless sensors can easily cover loading docks, storage aisles, and inventory areas without expensive cabling.
Temporary Security
Construction sites and temporary offices require portable alarm systems that can be quickly relocated.
Future Trends in WiFi Alarm Technology
The next generation of intrusion alarm systems will integrate:
- AI-assisted intrusion detection (reducing false alarms through intelligent analysis)
- Edge computing sensors (processing detection data locally)
- Smart home ecosystem integration (full compatibility with automation platforms like Tuya)
- Advanced mobile security management (full remote system diagnostics)
These innovations will further improve the efficiency and intelligence of wireless alarm systems.
Conclusion: Building a Reliable Intrusion Alarm Network in One Hour
Modern WiFi alarm systems and GSM WiFi alarm systems have transformed how intrusion detection networks are deployed.
What once required complex wiring, professional technicians, and several hours of installation can now be completed within one hour using Plug-and-Play wireless technology.
By following the installation methodology outlined in this guide, installers and security professionals can:
- Deploy reliable intrusion detection networks rapidly
- Optimize wireless sensor placement
- Ensure strong communication reliability (WiFi + GSM backup)
- Deliver professional-grade protection for homes and businesses
For security distributors, system integrators, and professional buyers, the combination of RF wireless sensors, WiFi connectivity, and GSM backup communication offers one of the most scalable and practical intrusion alarm solutions available today.
Organizations that adopt these technologies can dramatically improve installation efficiency, system reliability, and long-term customer satisfaction—while providing the fast, intelligent protection that modern environments demand.
If you follow these steps, your GSM WiFi alarm system will be up and running reliably in under one hour—giving you or your clients true peace of mind from day one.