

In the high-stakes world of burglar alarm systems, where a single vulnerability can turn a fortress into a sitting duck, alarm siren wiring isn’t just about connecting wires—it’s about engineering a deterrent that actually works when it counts. As a seasoned expert in the intrusion detection industry with over two decades of hands-on experience designing and deploying commercial and industrial security setups, I’ve seen too many systems fail not because of faulty hardware, but due to overlooked wiring flaws that intruders exploit in seconds. This guide dives deep into the nitty-gritty of alarm siren wiring for real-world installations, pitting indoor against outdoor sirens, optimizing cable routing, and fortifying tamper-safe designs. Whether you’re a project manager overseeing a warehouse retrofit or an installer aiming for premium contracts, these proven tactics will help you build systems that don’t just sound off—they scare off threats and stand up to sabotage.
We’ll start by breaking down the core differences between indoor and outdoor sirens, then explore tailored wiring approaches for various environments. From there, we’ll tackle cable routing techniques that minimize exposure, integrate tamper loops for unbreakable security, and address surge protection to safeguard against nature’s wrath. By the end, you’ll have actionable steps to implement these in your next project, ensuring your burglar alarm setups deliver reliability that clients demand and intruders dread.
Key Differences Between Indoor and Outdoor Sirens in Burglar Alarm Wiring
To master alarm siren wiring, you first need to grasp why indoor and outdoor sirens aren’t interchangeable. Indoor sirens, typically compact units like piezo buzzers or small speakers integrated into control panels, are designed for controlled environments. They operate on low-voltage DC power (usually 12V) and focus on alerting occupants without overwhelming them—think a piercing 85-100 dB tone that’s effective in enclosed spaces like offices or homes. Wiring for these is straightforward: short runs of 18-22 AWG twisted-pair cable suffice, often concealed behind walls or in ceilings to maintain aesthetics.
Outdoor sirens, on the other hand, are the heavy hitters—weatherproof beasts rated for IP65 or higher, blasting 110-120 dB to cover vast areas and deter from afar. These demand robust wiring to handle exposure to elements, potential vandalism, and longer distances from the control panel. A common pitfall I encounter in audits is treating outdoor siren wiring like an indoor job: skimpy cables that corrode, exposed runs that beg to be cut, or no surge suppression leading to fried panels during storms. In commercial setups, like retail stores with perimeter protection, outdoor sirens must integrate with strobe lights for visual impact, requiring multi-conductor cables (e.g., 4-6 cores for power, tamper, and signal).
The wiring implications are profound. For indoors, focus on noise containment and integration with HVAC ducts for better sound propagation—route cables away from EMI sources like fluorescent lights to avoid false triggers. Outdoors, prioritize UV-resistant, armored cables to combat sun damage and rodent gnaws. In industrial sites, such as factories with heavy machinery, outdoor sirens might need explosion-proof housings (ATEX-rated), and wiring must comply with NEC standards for hazardous locations, using conduits that prevent spark risks.
Consider a real-world scenario: A mid-sized warehouse I consulted for had indoor sirens that worked fine for office alerts but outdoor ones that failed during a break-in because rainwater ingress shorted the exposed wiring. The fix? Switching to gel-filled, direct-burial cables and elevating junction points. This isn’t theory—it’s the difference between a system that merely complies and one that performs under duress.
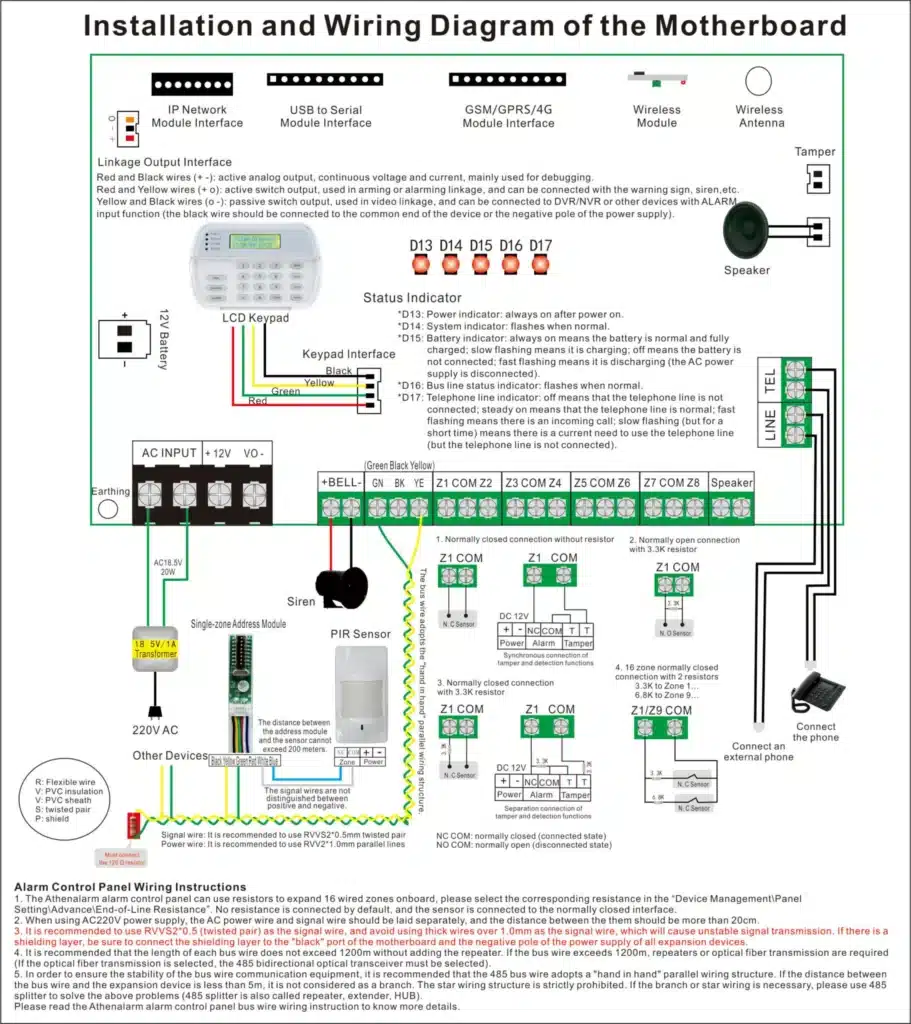
Cable Routing Essentials: Tailoring Paths for Maximum Security and Reliability
Cable routing in alarm siren wiring is where many installations go wrong, especially when ignoring the “real-world” factor. In burglar alarm systems, poor routing doesn’t just cause signal loss; it invites tampering that renders the entire setup useless. Let’s dissect best practices, starting with indoor environments.
For indoor sirens in residential or office burglar alarms, concealment is key. Route cables through wall cavities or drop ceilings using fish tape for clean pulls. Avoid parallel runs with AC power lines to minimize induction noise—maintain at least 12 inches separation. In a typical home setup, connect the siren to the panel’s siren output terminals (positive and negative for supervised loops) using 18 AWG stranded wire. If extending beyond 50 feet, calculate voltage drop: For a 12V siren drawing 500mA, use V = I * R * L / 1000 (where R is resistance per 1000 ft), ensuring drop stays under 10% to prevent weak output.
Shifting to outdoor siren wiring, the game changes dramatically. Exposed routes are a no-go—intruders can snip them in under 10 seconds. Instead, employ buried conduits or aerial armored cables. For ground-level installations, use Schedule 40 PVC conduits buried 18-24 inches deep, backfilled with sand to cushion against settling. In urban commercial zones, where digging isn’t feasible, route via building exteriors using metal-clad (MC) cable secured with tamper-proof clamps every 4-6 feet.
A pro tip from my fieldwork: Incorporate redundant paths. In a shopping mall project, we ran dual cables—one primary, one backup—through separate conduits. If one gets cut, the system switches automatically via relay modules, buying time for response. For long-distance runs (over 200 feet), like in industrial parks, use shielded twisted-pair (STP) to combat EMI from nearby equipment, and install inline amplifiers if signal attenuation hits 3dB or more.
But routing isn’t just physical—it’s strategic. In tamper-safe designs, loop cables back to the panel for end-of-line (EOL) supervision. A cut anywhere triggers an immediate fault, alerting monitoring centers before the siren is disabled. For outdoor sirens on poles, route cables inside the pole itself, sealed with weatherproof glands, and ground the assembly to dissipate static.
Fortifying Tamper-Safe Designs: Integrating Wiring with Anti-Sabotage Features
Tamper-safe design elevates alarm siren wiring from basic connectivity to a fortress against deliberate attacks. In burglar alarm systems, a siren’s vulnerability often lies in its enclosure and connections—intruders target these to silence the alert. Here’s how to bind wiring inextricably with tamper protection.
Start with the basics: Every siren should feature a tamper switch—a microswitch that activates if the cover is removed. Wire this in series with the siren circuit using a dedicated pair in your multi-core cable. For supervised systems, add an EOL resistor (typically 1kΩ) at the siren end; any disruption (cut or short) changes loop resistance, flagging a tamper event.
For outdoor sirens, where physical assault is common, go beyond switches. Use armored cables like steel-wire armored (SWA) types, which resist cutting tools. In a recent industrial installation for a chemical plant, we embedded fiber optic strands in the wiring sheath—severing them breaks a light loop, instantly triggering the alarm. This tamper loop design isn’t overkill; it’s essential for high-risk sites where a delayed response could mean catastrophic losses.
Detailed steps for implementing a tamper-safe wiring setup:
- Assess the Site: Survey for vulnerabilities—exposed walls for indoors, accessible roofs for outdoors. Identify high-risk zones like entry points.
- Select Components: Choose sirens with built-in tamper contacts (e.g., Honeywell’s Ademco series). For cables, opt for 22/4 shielded for indoors or 18/6 armored for outdoors.
- Prepare the Panel: At the control panel (e.g., DSC Neo or Honeywell Vista), program a zone for tamper supervision. Connect the tamper loop to a dedicated input.
- Route and Connect: Pull cable from panel to siren, avoiding sharp bends (minimum radius 6x cable diameter). At the siren, wire power (+/-), signal, and tamper pairs. Install the EOL resistor across tamper terminals.
- Test the Loop: Use a multimeter to verify continuity (should read resistor value). Simulate tampering by opening the cover or cutting a wire—ensure the panel alarms immediately.
- Secure Junctions: Use lockable junction boxes with tamper switches. For outdoors, epoxy-seal connections to prevent moisture tampering.
- Integrate with Software: In IP-based systems, link to CMS software for real-time notifications. Test end-to-end: Arm the system, tamper the siren, confirm siren activation and remote alert.
This approach addresses a core pain point: Systems that “work” in tests but fail in attacks. By tying wiring to tamper loops, you ensure the siren isn’t just loud—it’s resilient.

Application-Specific Wiring: Home, Commercial, and Industrial Burglar Alarms
Burglar alarm wiring must adapt to the environment, as a one-size-fits-all approach spells disaster. In home setups, simplicity reigns: Indoor sirens suffice for most, wired with basic 22 AWG from a hybrid panel like the Ring Alarm Pro. Route discreetly under baseboards or through attics, focusing on integration with smart home ecosystems for app-controlled tests. Tamper-safe? Basic switches are enough, but add battery backups to counter power cuts.
Commercial applications, such as retail or office buildings, demand scalability. Here, mix indoor sirens for zoned alerts (e.g., silent in lobbies, full blast in storage) with outdoor units for perimeter deterrence. Wiring involves daisy-chaining multiple sirens on a bus system like RS-485 for addressable control, allowing partitioned responses—arm only the warehouse after hours. Cable routing: Use plenum-rated for air-handling spaces to meet fire codes. A common issue? Overloading circuits; limit to 1A per run, using power boosters for extended setups.
Industrial sites push boundaries: Harsh conditions like vibrations or corrosive atmospheres require rugged wiring. For a manufacturing plant I designed, we used halogen-free, oil-resistant cables routed in galvanized steel conduits. Outdoor sirens were explosion-proof, wired with intrinsically safe barriers to prevent sparks. Long-distance challenges? Fiber optic converters for runs over 1000 feet, immune to EMI from motors. Tamper designs included vibration sensors on cables, detecting sawing attempts.
Pain point solved: In industrial zones, lightning strikes can surge through wiring, damaging panels. Install surge protectors (e.g., MOV-based with 20kA rating) at both ends, grounded to a dedicated rod. Steps for surge-proof wiring:
- Map Exposure: Identify lightning-prone areas via historical data.
- Choose Protectors: Select UL-listed SPDs matching system voltage.
- Install at Panel: Wire in parallel with siren outputs, clamping surges.
- Ground Properly: Use #6 AWG copper to a 10-ft rod, resistance <25Ω.
- Test Annually: Simulate surges with a tester; replace if degraded.
Protecting Against Environmental Hazards in Outdoor Alarm Siren Wiring
Outdoor alarm siren wiring faces Mother Nature’s fury—rain, wind, UV, and especially lightning. A single surge can cascade failures, turning a robust burglar alarm into scrap. To counter this, design with redundancy and protection layers.
First, material selection: UV-stabilized PVC or polyethylene jackets for cables, rated for -40°C to 80°C. For wet locations, use wet-rated (THWN) conductors. Routing: Avoid low-lying areas prone to flooding; elevate or use submersible conduits.
Lightning and surges? Optical isolation or gas discharge tubes (GDTs) are game-changers. In a coastal factory install, we isolated siren wiring with optocouplers, preventing ground potential differences from frying electronics. For electro-magnetic pulses, ferrite beads on cables suppress transients.
Detailed anti-surge protocol:
- Risk Assessment: Use NFPA 780 for lightning density maps.
- Install SPDs: Place at panel, mid-run (for >300ft), and siren.
- Bond Grounds: Ensure equipotential bonding to avoid loops.
- Shield Cables: Ground shields at one end only to prevent currents.
- Maintenance: Inspect quarterly for corrosion; replace SPDs post-strike.
This fortifies systems, ensuring sirens blare even after storms.
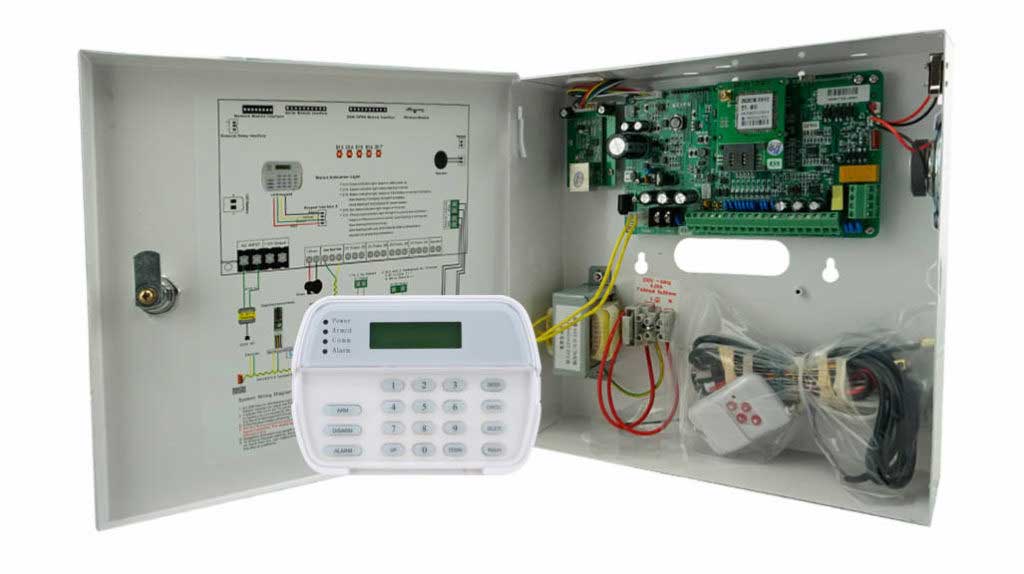
Logical Partitioning: Sirens and Control Panels in Zoned Designs
Effective burglar alarm systems partition sirens logically with panels for targeted responses. In multi-zone setups, wire indoor sirens to local zones for contained alerts, outdoor to global for full-site activation.
For a commercial complex: Zone 1 (offices) with indoor sirens on short loops; Zone 2 (perimeter) with outdoor on armored runs. Use programmable outputs on panels like Bosch’s RPS to trigger specific sirens based on events—e.g., tamper in Zone 2 activates all outdoors.
Steps for zoned wiring:
- Design Layout: Map zones by risk—high-value areas get dedicated sirens.
- Wire Zones: Use color-coded cables; connect to panel’s zone inputs/outputs.
- Program Logic: Set rules in software, e.g., “If Zone 1 breach, sound indoor only.”
- Test Scenarios: Simulate breaches; verify selective activation.
- Scale Up: For large sites, use expanders for more zones.
This logic ensures efficient, non-overwhelming responses.
Real-World Case Studies: Lessons from the Field
In a 50,000 sq ft warehouse retrofit, initial outdoor siren wiring used exposed PVC—cut during a test intrusion. We rerouted via buried metal conduits with tamper loops, adding surge protection. Post-install, the system withstood a real storm and deterred a break-in attempt.
Another case: A high-end jewelry store with mixed indoor/outdoor sirens. Wiring integrated strobe-tamper designs; a attempted sabotage triggered immediate police response. Key takeaway? Binding wiring to anti-tamper elevates deterrence.
Conclusion: Elevate Your Burglar Alarm Installations Today
Mastering alarm siren wiring means building systems that endure and intimidate. From differentiating indoor vs outdoor needs to tamper-proof routing and surge defense, these strategies address real pains, delivering reliability that wins contracts. Implement them, and watch your projects stand out. Ready to discuss custom designs? Contact us for expert consultations.